Vifinity
Soldering can, at times, become very dull and monotonous amd what better way to help aleviate that boredom than with some music?
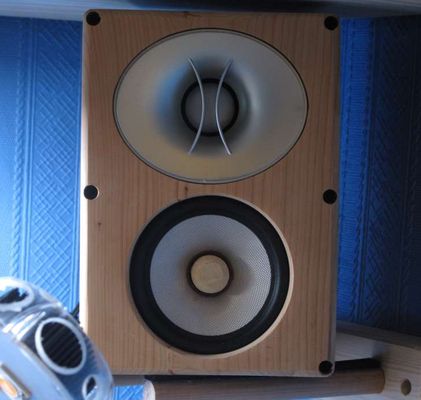
That's pretty much how this design came about. I already had the tweeters and integrated waveguide sitting on a shelf. These were some surplus units from Infinity that appeared on ebay for next to nothing. The offer seemed too good to pass so I bought a pair.
I'd had previous success in building small loudspeakers with Hammond's aluminium boxes, the Aliband and SBBT had worked extremely well, and while not the perfect cabinet material it is certainly functional where compactness and simplicity are required. It just happened that Hammond had a much bigger version of these and from looking at the dimensions it seemed like Vifa's TC/TG9 range of drivers would be a good match.
These drivers had been around for a little while and had gained traction in the DIY arena as being very high bang for buck. Low distortion motors attached to well designed soft cones. That certainly sounds attractive so I decided to give the fibreglass cone TG9FD10-04 a run for its money.
These are built surprisingly well. A nice non resonant polymer chassis with decent venting under the spider. A pole vent is included but in my units generated a horrible resonance and along with the cavity underneath the dustcap, sang like a canary beneath around 1kHz. Either the pole vent is too small or Vifa need to add in some damping material beneath the cap, or add in perforations to the voice coil.
As a result measured distortion was significantly worse than it should have been towards lower frequencies. This caused a massive rise in both 3rd and 5th order harmonics, something I was not particularly happy about. Plugging the pole vent made obvious changes and showed that the issue was associated with the airspace associated along with it so off came the dustcap. Having done so I fashioned a small phase plug out of a wooden dowel and screwed it into place. Ah, silence, the resonance issue BEGONE!
Below are some pictures showing the driver + phase plug and attachment from the rear.
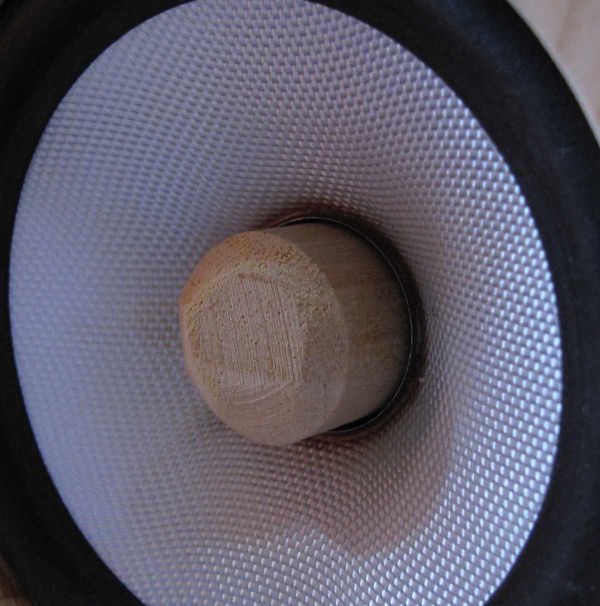
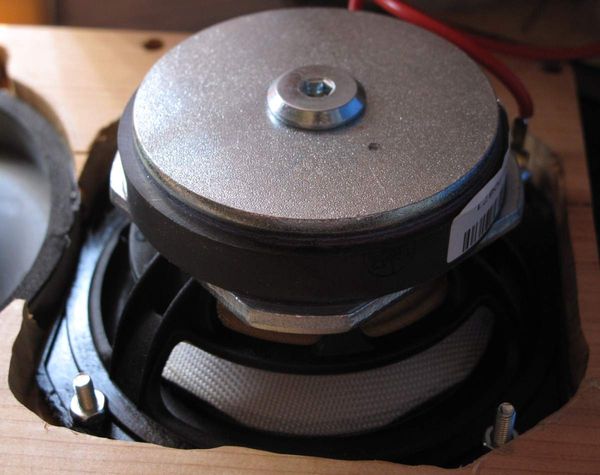
The nice thing about the pole vent is that it is just the right size for an M6 bolt to pass through. I already had some threaded inserts and M6 bolts lying around and these made the perfect solution for affixing the phase plug into place.
Much like the Saton, that came after this design, overall response flatness was not a target goal of the passive crossover. As a system wide DSP was available the xover simply needed to integrate the drivers properly, about a suitably chosen xover point, and the DSP could handle the rest.
Measurements
The tweeters response is pretty standard, a rising response towards the low end, coupled with a bit of a hump. This is due to the waveguide loading as well as the possibility of a high Q bump. Neo tweeters often have a high Q bump on their low end due to insufficient space beneath the dome/surround for a more optimum alignment. A tweeter is basically a tiny sealed box loudspeaker. A high Q alignment isn't going to make the tweeter sound worse in comparison, it simply requires more xover work to hammer it flat.
The woofer has a nice flat extended response save from the diffraction bump at 1700Hz.
Given that the tweeter isn't particularly well extended towards the low frequencies it would definitely make sense to measure its distortion. This is something that I did but unfortunately I didn't save. Needless to say the tweeter is perfectly capable, but from memory this was only down till around 2.5kHz. Certainly not one of the better neo domes out there but usable and due to the waveguide loading should really be crossed over at around 3-4kHz for a directivity match to a suitable woofer or midrange.
Unsurprisingly that's exactly what I did here...
...placing the xover at just over 3kHz. There is considerable asymmetry here that was necessary, in part to bring the drivers into correct phase alighment, but also because I was recycling parts from my parts bin and had to make do with the component values that I had. For all its issues the xover works very well.
As noted solving gross linearity issues was not a target of this xover and a notch filter would most certainly be required on the woofer, in a fully passive loudspeaker, as would more attenuation on the tweeter. This was left deliberately hot so that the DSP would only be required to attenuate should the tonal balance need to be adjusted.
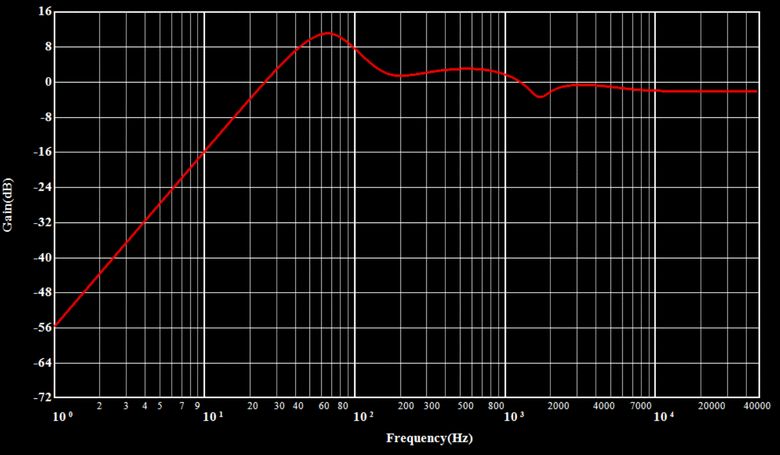
When it comes to the EQ a starting point is necessary and the frequency response below highlights the frequency response of the loudspeaker with it in place.
As noted solving gross linearity issues was not a target of this xover and a notch filter would most certainly be required on the woofer, in a fully passive loudspeaker, as would more attenuation on the tweeter. This was left deliberately hot so that the DSP would only be required to attenuate should the tonal balance need to be adjusted.
When it comes to the EQ a starting point is necessary and the frequency response below highlights the frequency response of the loudspeaker with it in place.
A slight smiley faced frequency response was the target. This usually proves successful in providing a decent amount of air, for excitement in applications where the speakers would be listened to off axis with the raised lower end giving warmth to the sound and a listen all day, non fatiguing, sound quality. Maybe not the utmost in neutrality but certainly enjoyable for extended periods of time, even when tired and possibly with a bit of a headache! (Soldering remember!)
The crossovers, transfer functions and impedance are shown below.
The crossovers, transfer functions and impedance are shown below.
Easy to drive and simple xovers.
As mentioned a DSP was used with this design. The system featured a PCM5142 DAC from TI that contains an integrated miniDSP. This is much the same as the DAC/DSP found within the Aliband and the SBBT. These DACs do sound very nice and the EQ applied to the Vinifity loudspeaker can be seen below.
As mentioned a DSP was used with this design. The system featured a PCM5142 DAC from TI that contains an integrated miniDSP. This is much the same as the DAC/DSP found within the Aliband and the SBBT. These DACs do sound very nice and the EQ applied to the Vinifity loudspeaker can be seen below.
At the time this system did not have a subwoofer so a Linkwitz Transform was used to give the speakers a decent amount of bass extension. These were only intended for nearfield listening so the speakers max SPL was sacrificed for more bass.
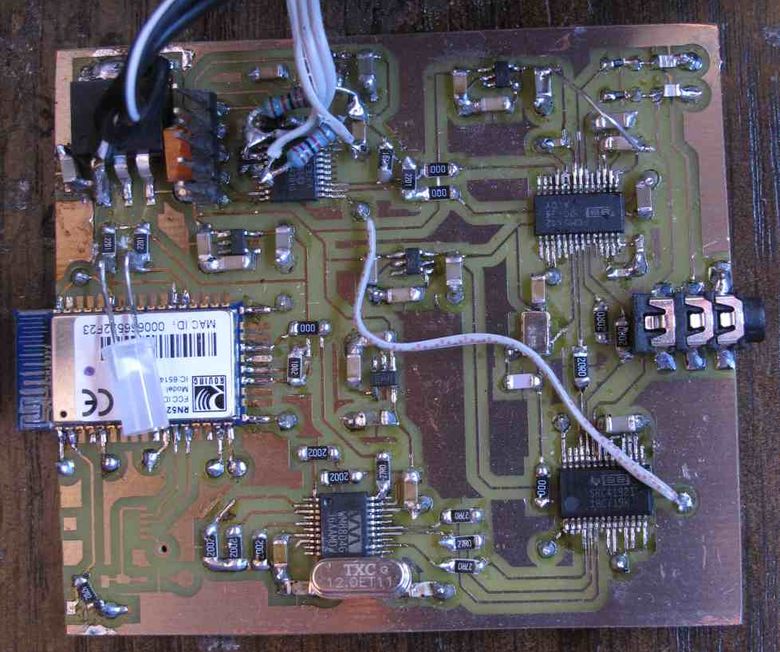
The system used a TPA3118 amplifier chip in combination with the RN52 bluetooth module and aforementioned PCM5142 DAC. A S/PDIF receiver was required at the time because the RN52 couldn't actually output an I2S signal! More recent firmware updates have enabled this feature. It was supposed to be present at the devices launch but didn't really work. An SRC4192 was also used for completions sake in an attempt to help remove jitter from the digital signal and to also provide a fixed sampling frequency for the DSP within the DAC.
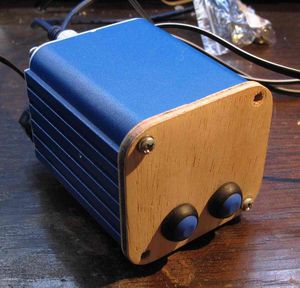
Below are some more pictures highlighting both the loudspeaker construction and showing the electronics.
The system used a TPA3118 amplifier chip in combination with the RN52 bluetooth module and aforementioned PCM5142 DAC. A S/PDIF receiver was required at the time because the RN52 couldn't actually output an I2S signal! More recent firmware updates have enabled this feature. It was supposed to be present at the devices launch but didn't really work. An SRC4192 was also used for completions sake in an attempt to help remove jitter from the digital signal and to also provide a fixed sampling frequency for the DSP within the DAC.
Below are some more pictures highlighting both the loudspeaker construction and showing the electronics.
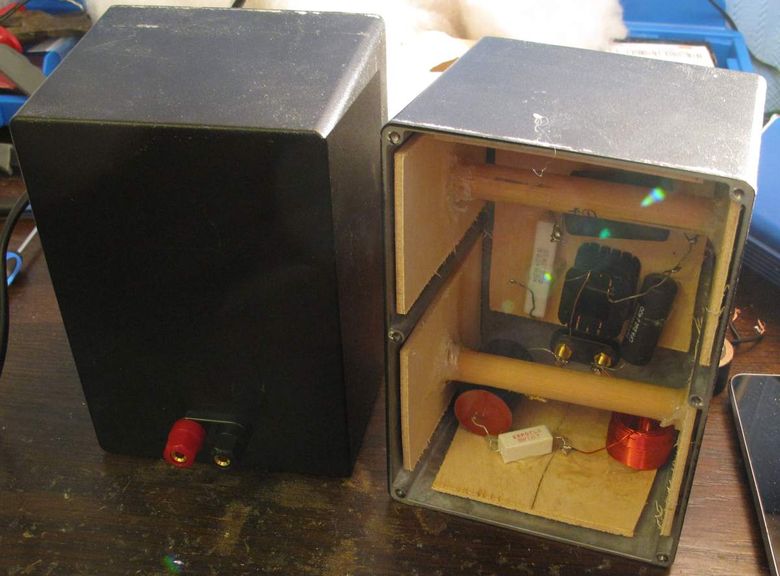
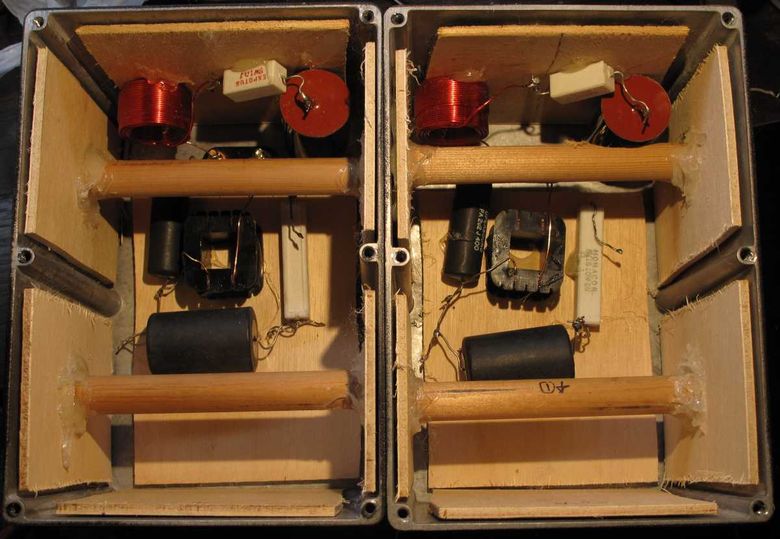
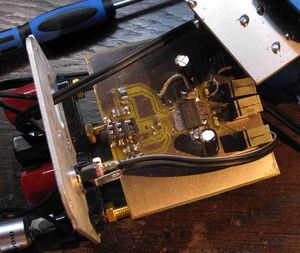
Due to the resonant nature of the aluminium boxes damping and bracing is important. Here I hot-melt glued in some thin panels of plywood to great effect. The crossovers can also be seen.
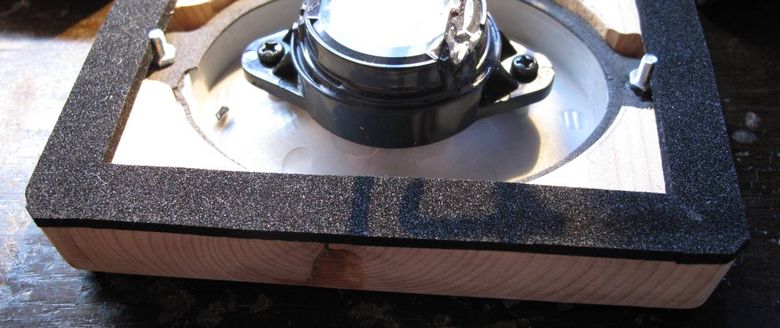
As with any loudspeaker sealing the cabinet is important. As the gap between the wooden front and aluminium box represents a large area where air could escape a strip of self adhesive foam was placed around the edge of the join to keep things airtight.
For completions sake here is a distortion sweep for the finished loudspeaker.
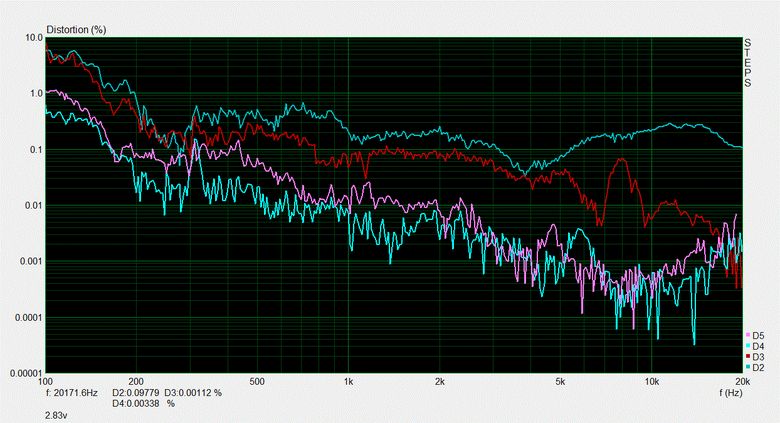
As can be seen the measured distortion of the completed loudspeaker is excellent and very low pretty much everywhere. The only issue is the distortion I mentioned earlier on at the start. As you can see there is still a rise in the 5th order harmonic below around 800Hz and a small rise in 3rd order at the same frequency. It looks like a remnant of the major problem that the driver first presented with but at a much lower magnitude. It's not catastrophic, it's just there and I don't feel that it should be, not if other measurements of the TC9 are anything to go by.
Still this is hardly a game breaker. The driver is inexpensive with impressive performance in its modified form.
These speakers really impressed me quite a lot, they were very easy to listen to and never put a foot wrong. The midrange that the TG9 offers is sublime and the Infinity dome sounds great too, loads of detail without spitting at you.